How can I trigger postcards from a Klaviyo flow?
It's easy to connect our API to Klaviyo to trigger a postcard from an existing Klaviyo flow -- no devs needed!
Looking to create a one-off or automated evergreen campaign targeting a Klaviyo segment or list instead? Explore our native Klaviyo integration.
Step 1: Grab your API key (<2 minutes)
Simply follow our step-by-step guide on how to create a new API connection for your integration and return to this page when done to continue with step 2.
Step 2: Create a PostPilot Flow (<5 minutes)
When you trigger a webhook from a Klaviyo flow, you need to tell PostPilot what to do. Follow our step-by-step guide on how to create a PostPilot flow targeting an API connection, and return to this page when done to continue with Step 3.
Step 3: Add a Webhook to your Klaviyo flow (<3 minutes)
Want to send postcards from multiple Klaviyo flows? No problem - just repeat step 2 above and add additional flows in PostPilot, one for every distinct Klaviyo flow.
(Then configure the appropriate destination URLs in each Klaviyo webhook.)
Create a webhook action
Just click this link to log into your Klaviyo account and head over to the flows page. From there, find the flow you want to integrate and click to edit it.
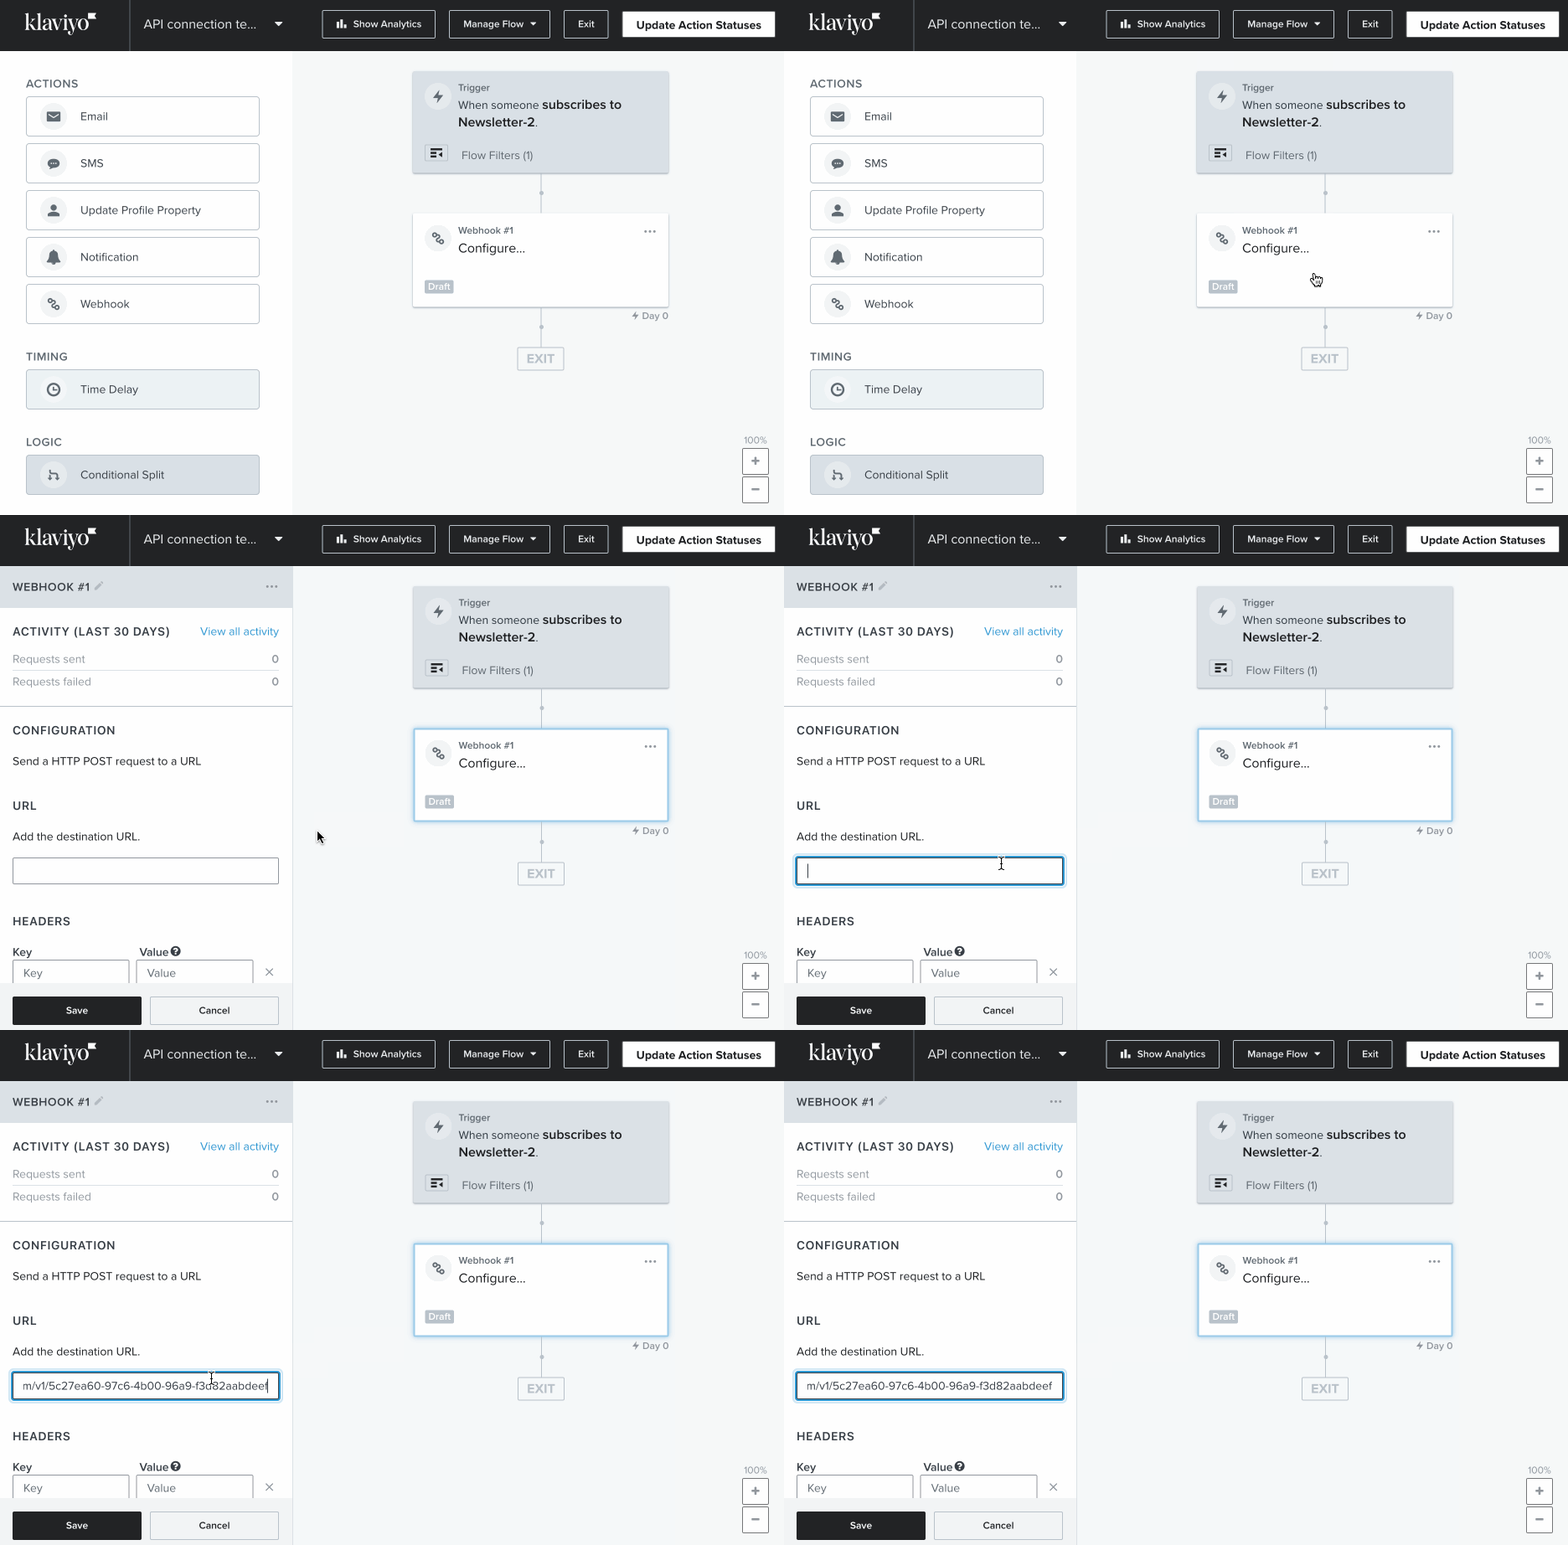
On the left pane of the flow editor, find "Webhooks" from the list of available Actions in the left menu, and click+drag to your flow:
Configure the webhook
Paste your API URL for the PostPilot flow you want to trigger (from step 4 when you previously created the flow) into the "destination URL" field of the Klaviyo webhook:

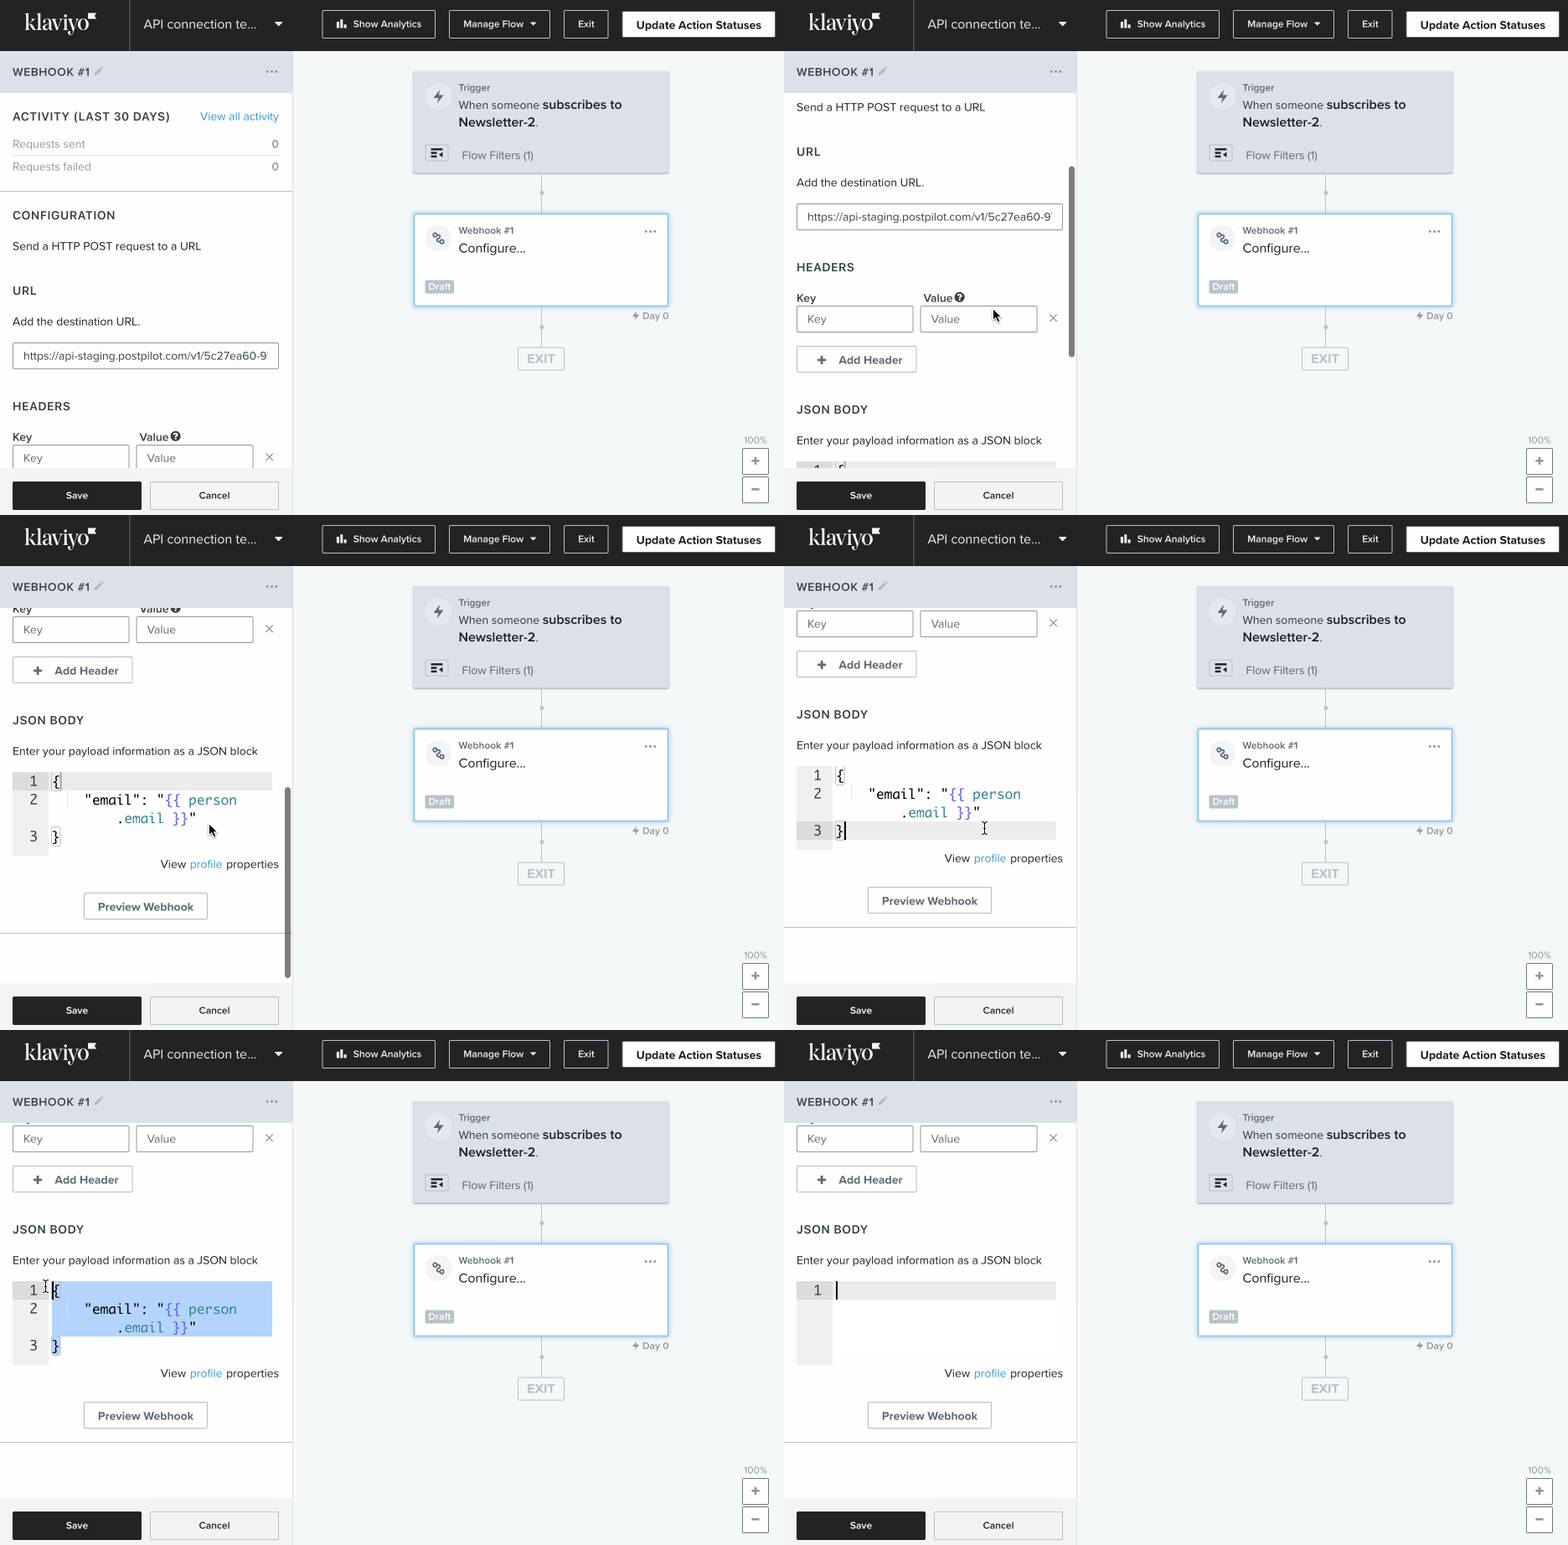
Next, delete the content that was added to the "JSON body" input by default:

Finally, copy and paste the below content exactly as-is into the "JSON body" field of the configuration:
{
  "reference_id": "{{ person.email }}",
  "firstname": "{{ person.first_name|default:'' }}",
  "lastname": "{{ person.last_name|default:'' }}",
  "email": "{{ person.email }}",
  "line1": "{{ person|lookup:'$address1'|default:'' }}",
  "line2": "{{ person|lookup:'$address2'|default:'' }}",
  "city": "{{ person.City|default:'' }}",
  "state": "{{ person.Region|default:'' }}",
  "postal_code": "{{ person.Zipcode|default:'' }}",
  "country": "{{ person.Country|default:'' }}"
}

(You can leave the "headers" section of the configuration empty.)
You should see a reference to the PostPilot API in the webhook action when you’re done:

Step 4: Test your webhook action
The only thing left to do is test the connection. (But that’s easy, too.)
Click on your new webhook action, and in the left pane, scroll down to click the “Preview Webhook” button.
Use the on-screen controls to select either a profile or event to use for test data (you’ll need one that contains mailing address fields), and click the “Send Test Request” button:
If all goes well, you’ll see a green confirmation message that the webhook was sent successfully.
Turn on the send block
If you haven't already, don't forget to turn on the send block to start sending mail to your customers and prospects using your new API integration between Klaviyo and PostPilot!
Note that when testing your API connection from Klaviyo, you may have added customers to the flow in PostPilot that will be sent postcards when the send block is enabled.
To prevent this, make sure you clear any pending events in the flow prior to enabling the send block.